Pitch range & key switches #
Ableton’s piano roll offers you pitches from C-2 to G8.
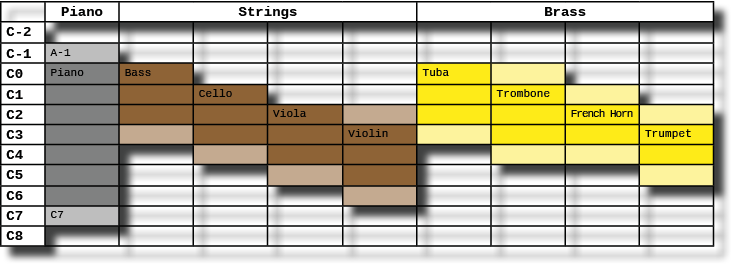
A piano with 88 keys allows you to play notes from A-1 to C7. This range is usually enough to cover the spectrum of all acoustic instruments like bass, cello, trumpet, guitar, clarinet or even a piccolo. The pitch range of the different instruments is more or less wide and limited to different octaves.
In the case of an orchestra, all instruments of a section together cover about the seven octaves of the orchestral spectrum. Here is an excerpt using the string and brass section as an example:

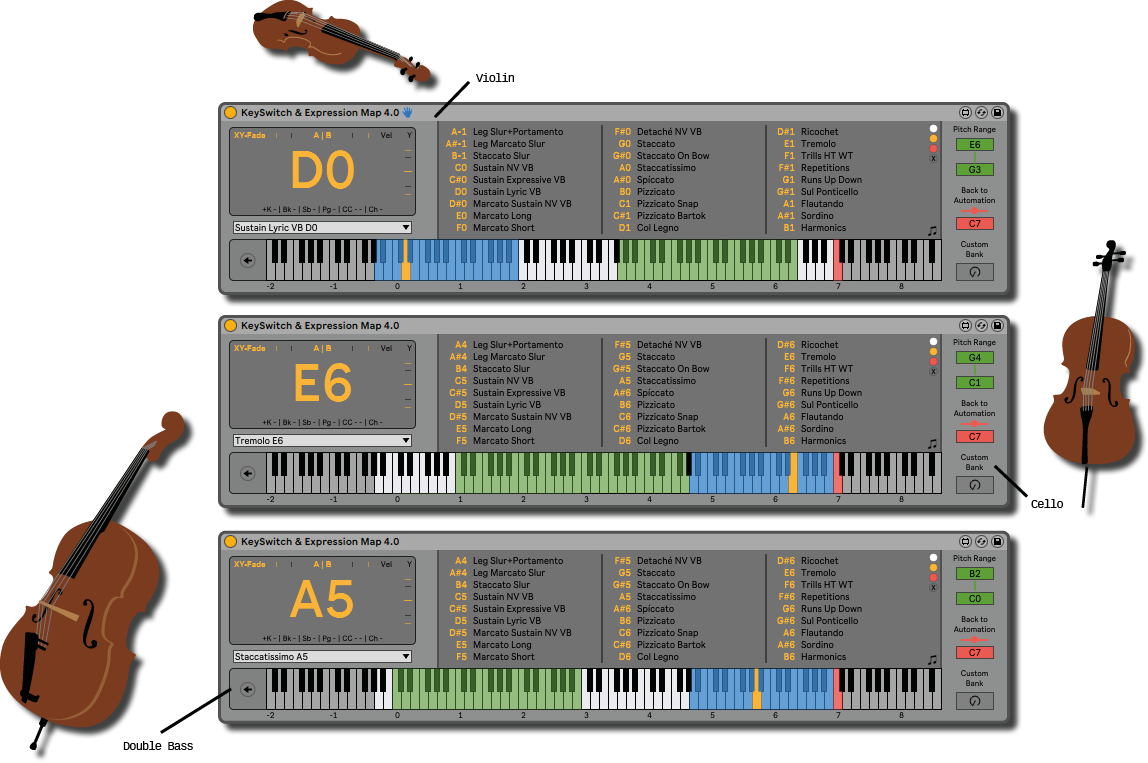
In general, this puts you in the comfortable position of using the remaining keys for your key switches. For a violin, for example, it would look like this:

The blue keys indicate your key switches, the green area is the pitch range of the instrument, which you can additionally configure and display.
So far so good! But as so often in life, the exception proves the rule. The first would be the piano itself, but even the concert harp, with its six and a half octaves, takes up almost the entire range of the piano keyboard. Finally, the frequency range of electronic devices like a synthesizer is more or less limited only by our ears.
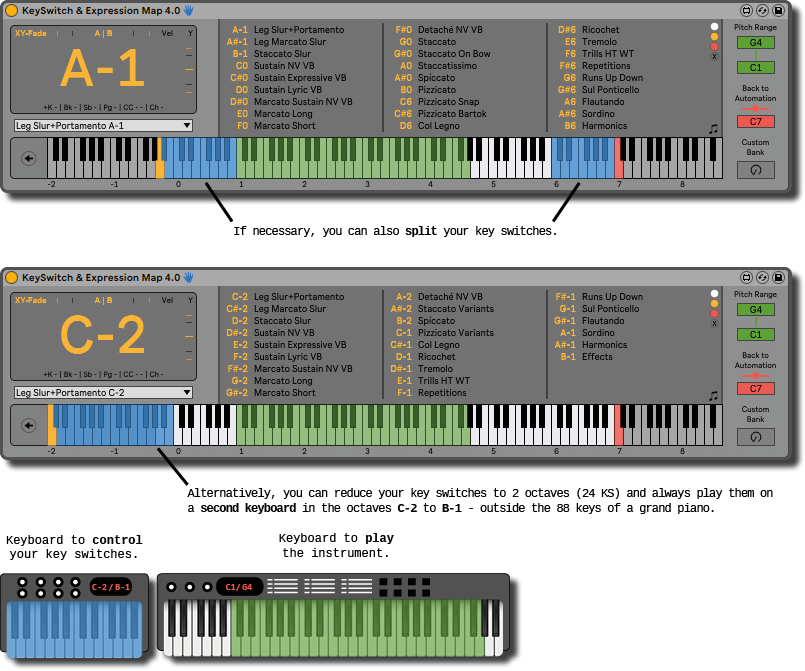
In this case, however, you can help yourself by using the lower and upper octaves of Ableton’s piano roll for your key switches. For a synthesizer, you can additionally filter out the notes of your key switches from the MIDI signal with the Mute option in the first tab of the settings.

As you can see, there are basically two ways to position your key switches. Either they vary depending on the instrument and are located below or above the range of the respective instrument, or you place your key switches outside of the piano range. This has a few advantages:
Like that all your key switches are always in the same place and you can probably play them soon blindfolded. Particularly if you place standard articulations like sustain, staccato, pizzicato etc. for all your instruments on the same notes. In addition, you could stick small labels on the keys with the names of the corresponding articulations for orientation purposes.
You do not block your master keyboard with key switches and can thus also divide them between different instruments of an orchestra section.
You do not have to think about whether the key switches of the current instrument are above or below the piano. In addition, you avoid pressing a key switch by mistake during a live performance or you suddenly play an unwanted note instead of changing the articulation.
However, the catch is that you need a second small keyboard that you pitch to the respective octave, or a MIDI controller with pads. This means on the one hand that this costs additional money if you have to buy the device especially. On the other hand, and from a very pragmatic point of view, it also means that you have to carry it around when performing live.
KSEM Router #

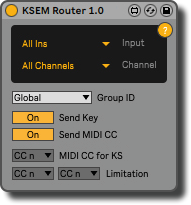
With version 4.2 the KeySwitch & Expression Map got support by a new colleague – the KSEM Router. It is a free additional tool for Ableton 11 that allows you to receive the MIDI signal of a keyboard or MIDI controller directly, without having it pass through the MIDI clip in the track.
In that way, you can use a second keyboard to exclusively control your key switches and position your key switches independently of the pitch range of your instrument. Additionally, you can even say goodbye to annoying ghost notes in the MIDI clip.
You can download and find more information about it in the section tools.
Automation Key #
Additionally you can assign a key switch in red, with which you can switch between automatic and manual mode. To be more precise, you can re-enable the automation envelopes for only the key switches or globally for your whole project. Thus, you can quickly improvise during a session or rehearsal and then return to the programming. The red dot between the two dashes above the automation key box shows you whether you are manually controlling your key switches or not.


